
How to Edit iPhone Photos Without Losing the Original
We all edit photos on our iPhones. Usually, when you crop or adjust a picture and hit done, the app overwrites your original file. You can always revert the changes later. But what if you want to keep the untouched original and the new edited version side-by-side?
There is a hidden trick to do exactly that without manually duplicating the file beforehand. By the end of this quick guide, you will know how to save both versions instantly.
Step 1: Crop or edit your photo
First, open the Photos app and select a picture you want to adjust.
- Tap
Editin the top right corner of the screen. - Make your desired changes. In this example, we are using the crop tool to reframe a nighttime shot of a building.
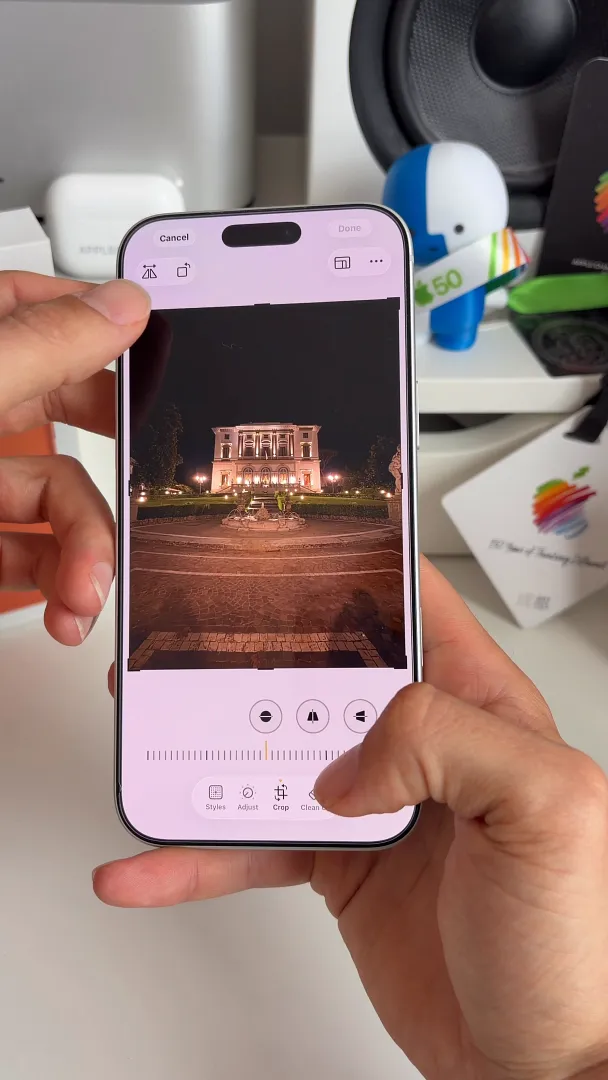
Step 2: Save as a duplicate
Here is where the magic happens. Do not tap the yellow Done button just yet.
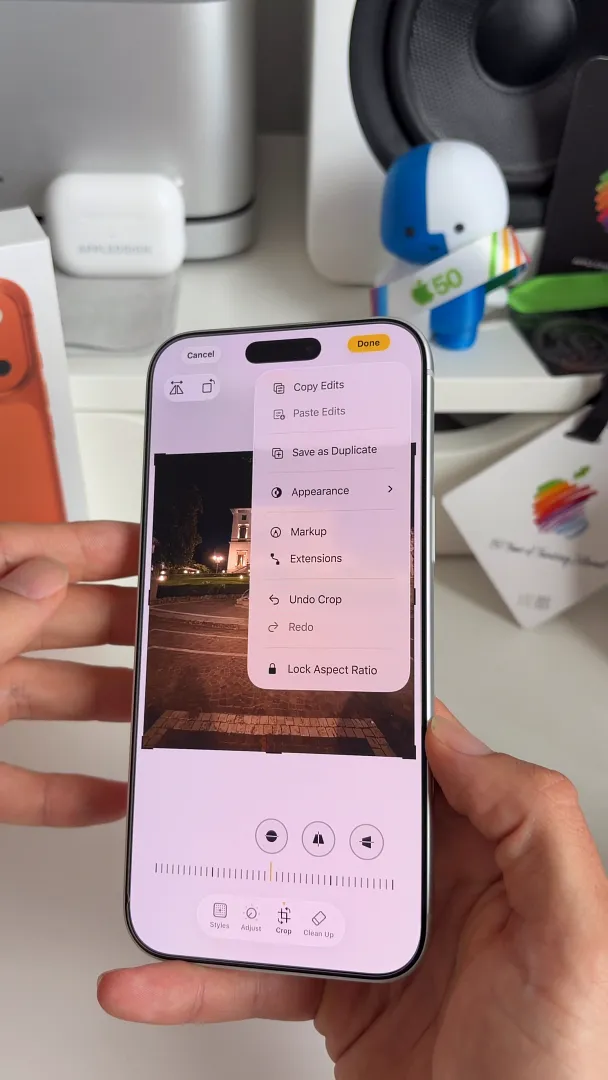
- Tap the circle icon with three dots
...located in the top right corner. - Tap
Save as Duplicatefrom the dropdown menu.
You're all set
That is it. When you return to your photo grid, you will see two distinct versions of your picture. Your original, unedited photo is safe. Your newly cropped version sits right next to it. Go give this a spin the next time you want to experiment with your edits.
Last updated: Oct 14, 2026