
10 Hidden Mac Tricks You'll Wish You Knew Sooner
I have been using a Mac for over 15 years. I love digging into the system to see exactly how everything works. The release of macOS 27 brought some incredible updates. Some features completely change how you navigate your daily tasks. Let's look at 10 hidden tricks you probably didn't know existed.
1. Customize your folder icons instantly
You can change those boring blue folder icons to anything you want. You do not even need to save the new image to your drive first.
- Select a folder and press Command + I to open the info panel.
- Open Safari and find an image you like.
- Click and drag the image directly from the browser.
- Drop it onto the small folder icon at the top left of the info panel.
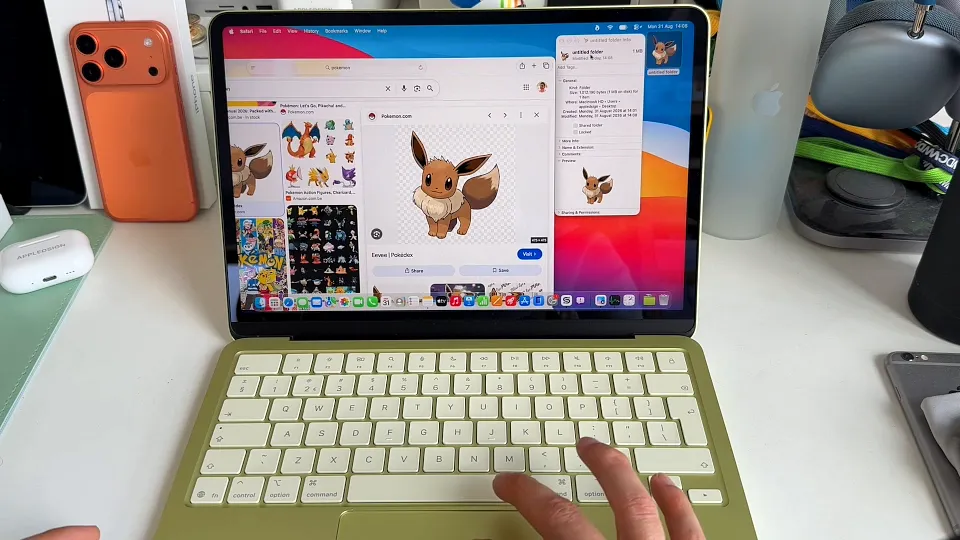
The icon updates immediately. This is a much faster way to color-code or brand your project folders.
2. See exact folder sizes in Finder
Finder hides folder sizes by default. This makes it frustrating to see what is actually eating up your storage. You can fix this with a quick settings toggle.
- Open a Finder window.
- Click View in the top menu bar.
- Select Show View Options.
- Check the box for Calculate all sizes.
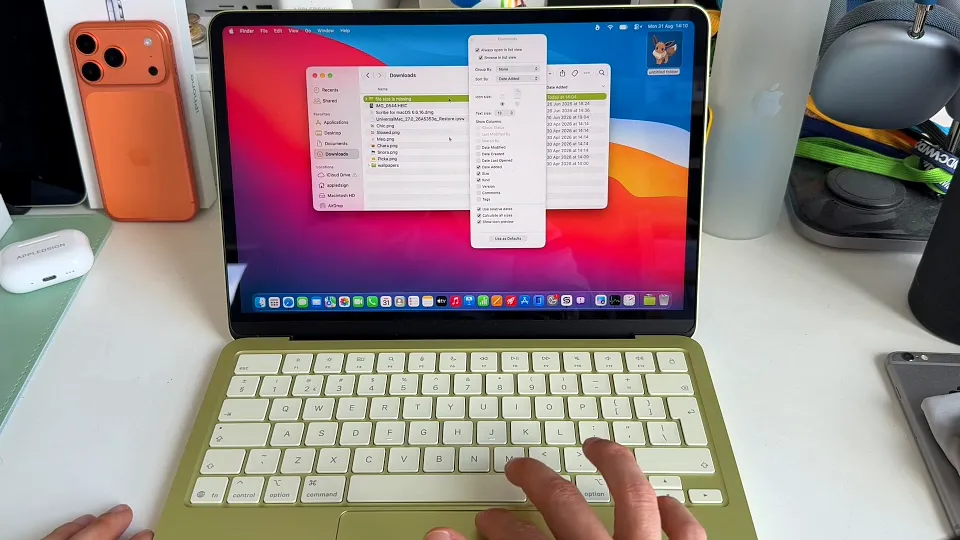
You can now scroll through your lists and see exactly how much space every folder takes up.
3. Navigate faster with the Path and Status bars
Moving back and forth between folders using the arrow buttons gets tedious. Finder has built-in navigation bars that make jumping around much easier.
- Open the View menu in Finder.
- Click Show Path Bar.
- Open the View menu again and click Show Status Bar.
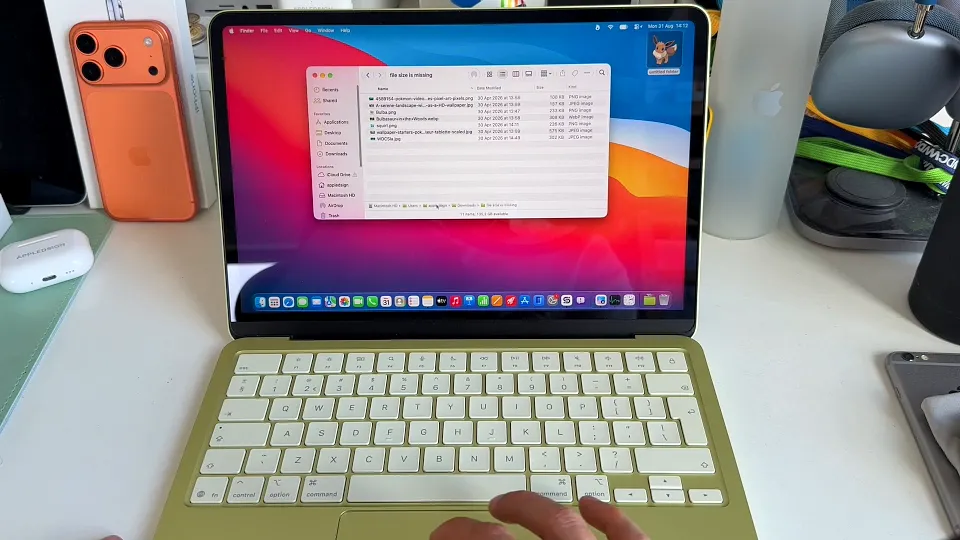
The status bar shows your total available storage space. The path bar displays your exact location in the file system. You can click any folder in that path to jump straight to it.
4. Put AirDrop in your Finder toolbar
Opening a new window just to use AirDrop slows you down. You can put an AirDrop button right at the top of your current Finder window for instant access.
- Right-click the empty space in your Finder top toolbar.
- Click Customize Toolbar.
- Drag the AirDrop icon up into the toolbar space.
- Click Done.
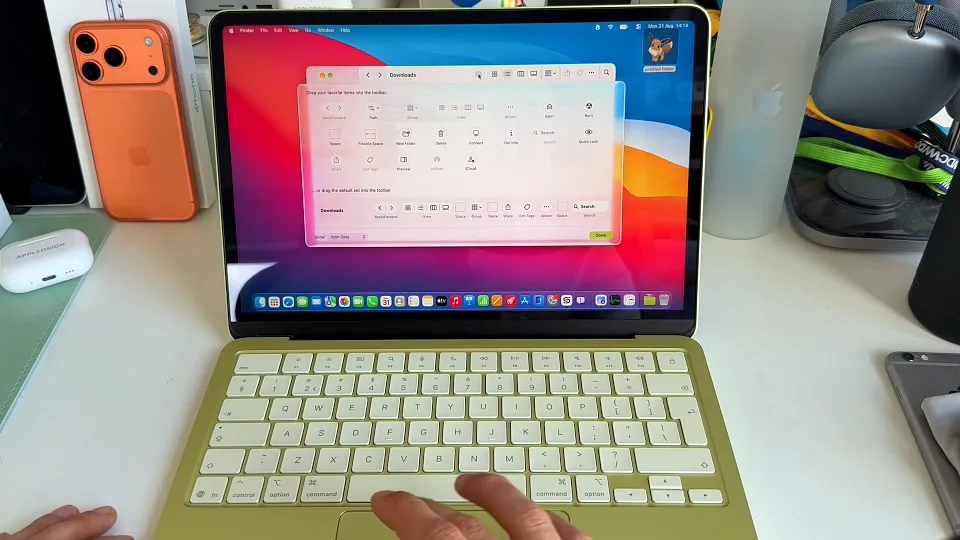
Select any file and click your new AirDrop button. The sharing menu pops up instantly. You can send files to your iPhone or iPad without dragging things around.
5. Keep your Dock clean by minimizing to app icons
Minimizing a window normally places a tiny preview on the right side of your Dock. This clutters up your screen very quickly. You can force windows to minimize directly into their own app icon instead.
- Open your Mac Settings.
- Search for "Minimize" in the left sidebar.
- Toggle on the switch for Minimize windows into application icon.
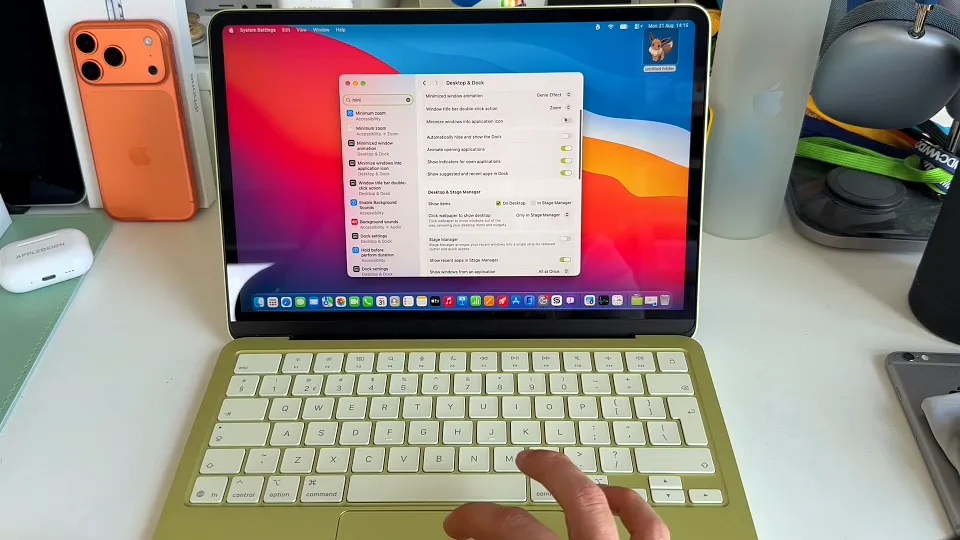
When you minimize Safari, it simply hides inside the main Safari icon. Your Dock stays perfectly clean.
Run Windows apps seamlessly
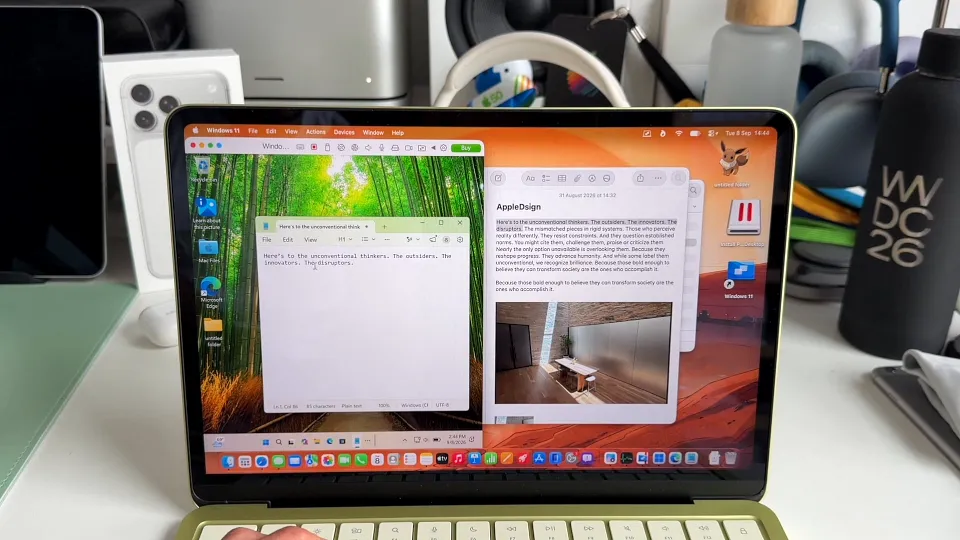
Sometimes you absolutely need a Windows application. Tools like Power BI Desktop, ZWCAD, and ArcGIS Pro are Windows-only. You do not need to buy a separate PC to use them. Parallels Desktop 27 brings the entire Windows ecosystem right to your Mac.
↪Run Windows on your Mac:
https://parallels.sjv.io/c/2540634/3392219/13842
It acts like just another window on your machine. The latest update adds OpenGL 4.3 support to handle demanding graphical software. You also get full access to your Mac files from within the Windows environment. It is a massive productivity booster for students and professionals.
6. Access your clipboard history
This feature requires macOS 27. After years of waiting, the Mac finally has a native clipboard manager. You can access previously copied links, text, and images without installing any third-party software.
- Press Command + Space to open Spotlight.
- Press Command + 4.
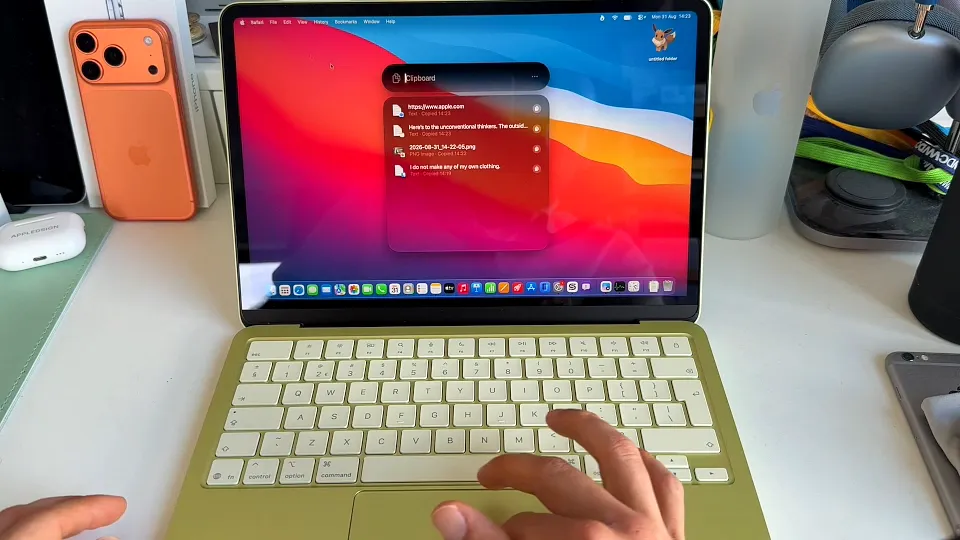
A window appears showing everything you recently copied. You can click any past item to retrieve it in seconds.
7. Copy text straight from images with Quick Look
You can copy text out of an image without opening a dedicated editing app. The built-in Quick Look feature handles this perfectly.
- Click once on an image file containing text.
- Press the spacebar to preview the image in Quick Look.
- Use your cursor to highlight the text right on the image.
- Press Command + C to copy it.
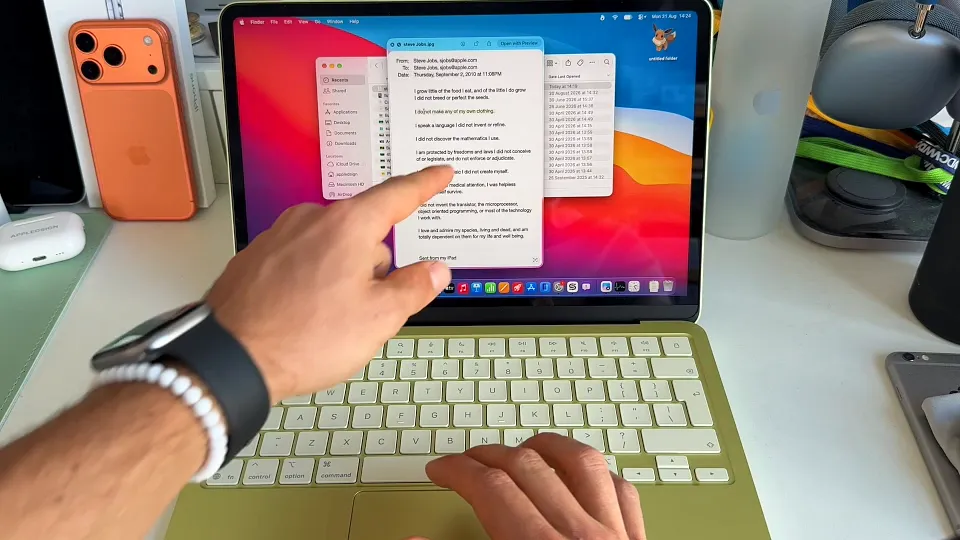
You can paste that text into any document. This saves you the hassle of opening Photos or Preview just to grab a quick quote.
8. Jump through text like a pro
Stop holding down the arrow keys to move your cursor across a document. A few simple keyboard shortcuts will seriously speed up your writing and editing.
- Hold Command and press the down arrow to jump to the very bottom of a document. Use the up arrow to jump to the top.
- Hold Option and press the left or right arrows to jump exactly one word at a time.
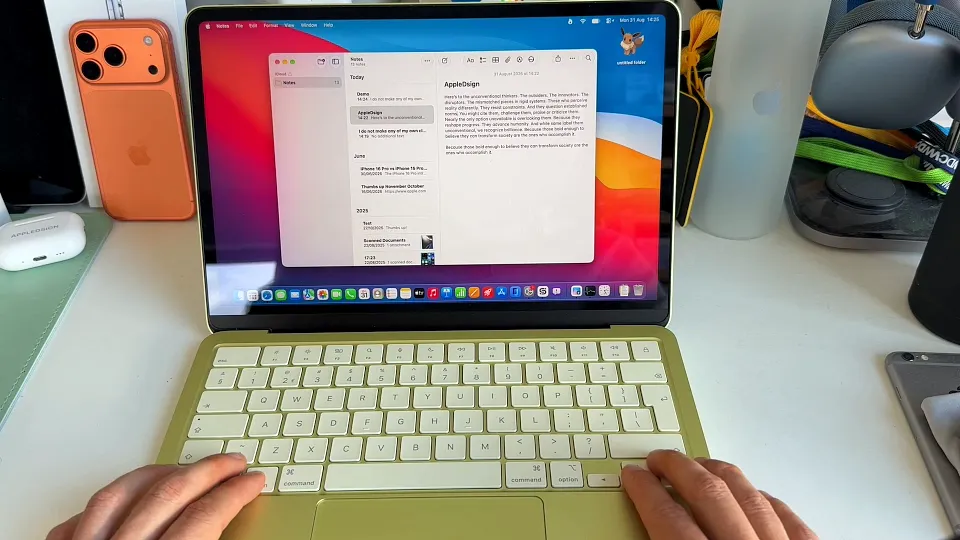
This trick works in almost every text field on your Mac. It makes editing long paragraphs much less painful.
9. Erase photobombers with the Clean Up tool
The new Photos editing features in macOS 27 are incredible. The Clean Up tool easily removes distracting objects from your shots.
- Open an image in the Photos app and click Edit.
- Select Clean Up from the top menu.
- Click and drag to highlight the object you want to erase.
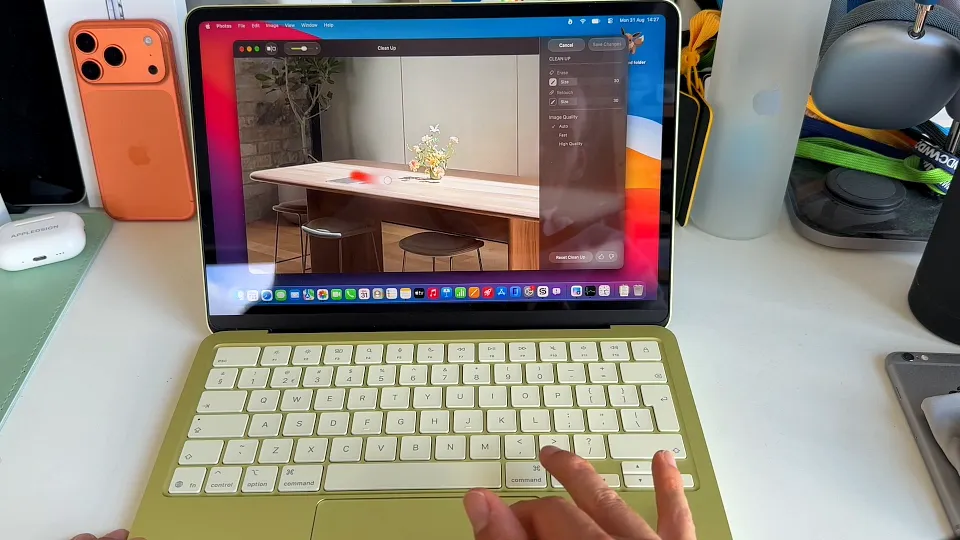
Apple Intelligence handles the rest. You can adjust the eraser size and choose between fast processing or high-quality results. You can also use the extend tool to expand the edges of your image naturally.
10. Copy screenshots directly to your clipboard
You probably know that Command + Shift + 3 takes a full screenshot. You also know that Command + Shift + 4 captures a specific section. Both of those methods clutter your desktop with files.
Add the Control key to the mix. Press Command + Shift + Control + 4.
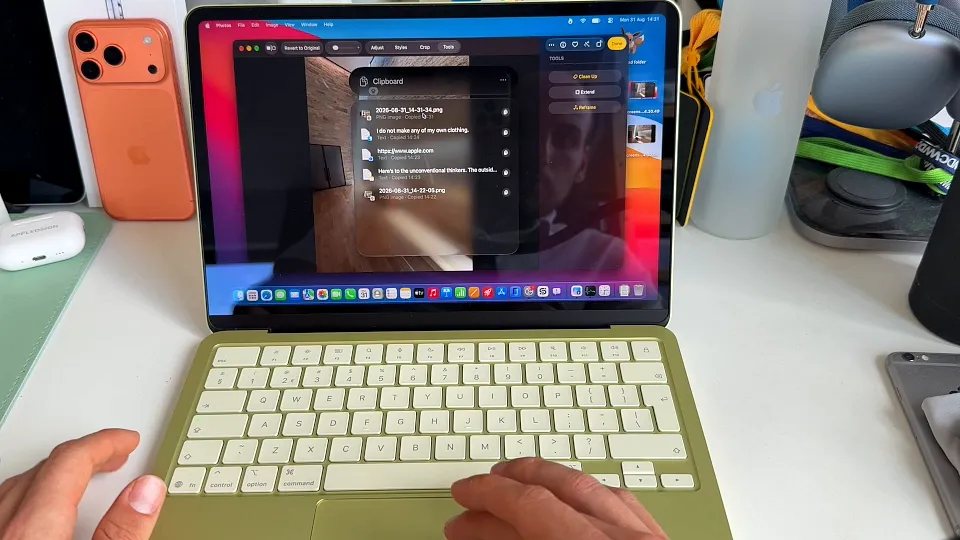
Select your area. The image saves straight to your clipboard. You can paste it right into an email or document without ever creating a messy file on your desktop.
Go explore
These tips completely changed how I interact with my machine. Try out the new navigation bars in Finder. Play around with the native clipboard manager. A few small workflow tweaks can save you a massive amount of time every single day.
Last updated: Oct 31, 2026