
The Best iPhone Camera Settings for Perfect Photos and Videos
The best camera is the one you always have with you. For most of us, that is an iPhone. You don't need to be a professional photographer to get incredible, natural-looking shots. You just need to flip the right switches.
Let's walk through the exact camera settings to capture clean, high-quality photos and buttery-smooth video straight out of your pocket.
Tweak your photographic style and formats
Apple's default color processing is good, but it sometimes lacks a little life. Open your settings, tap into Photographic Styles, and choose Bright. It adds a perfect touch of vibrance and light without looking like a heavy filter.
Next, head into Formats and check High Efficiency. This saves storage space and is required to unlock high frame rates like 4K at 60 fps or 240 fps slow motion.
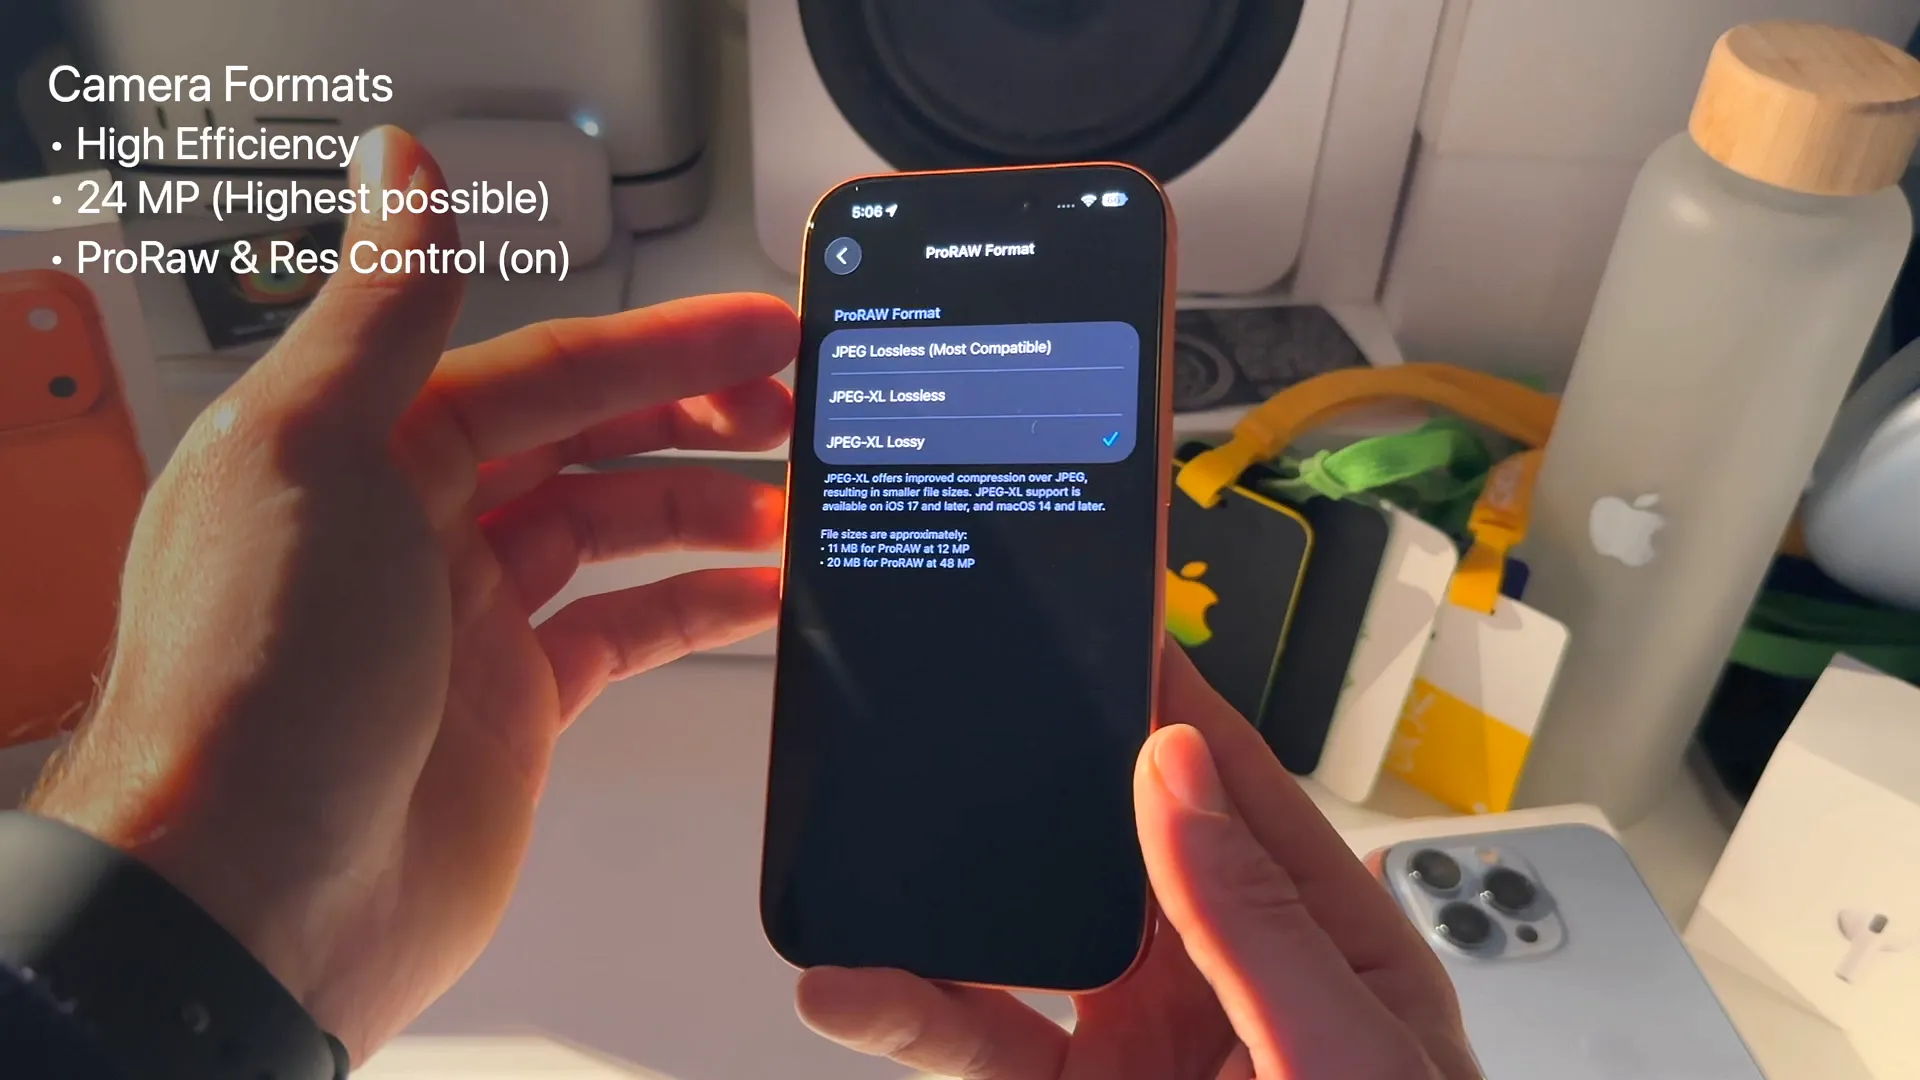
If you care about preserving maximum detail, toggle on ProRAW & Resolution Control and select JPEG-XL Lossy. This is a modern format that keeps incredible dynamic range and color accuracy without eating your entire hard drive.
Need maximum video control? Turn on Apple ProRes. It lets you shoot in a flat log format so you can add your own color grading later. Just remember you will need an external SSD if you want to shoot 4K at 60 fps in ProRes.
Dial in your video settings
If you post frequently on social media, set your default video resolution to 1080p at 60 fps. It looks incredibly smooth and avoids heavy compression from platforms like Instagram. When you are shooting highly detailed environments or nature, manually bump it up to 4K at 60 fps for that extra crispness.
Make sure to toggle on Show PAL Formats. This unlocks 25 fps options and is an absolute lifesaver. If you are filming under flickering indoor lights or holiday displays, switching to a PAL format instantly smooths out the flicker.

Here are a few other critical video toggles:
- Enhanced Stabilization: Keep this on for smooth handheld footage.
- Action Mode Lower Light: Turn this off. Toggling it on actually decreases stabilization, which completely defeats the purpose of Action Mode.
- HDR Video: Turn this off. HDR often looks overly harsh and overwhelmingly bright on standard displays.
- Lock Camera: Turn this off. If it is on, your phone is blocked from automatically switching lenses when you zoom in or out.
- Lock White Balance: Turn this on. It stops your video from awkwardly shifting colors from warm to cool as you pan across a room.
Upgrade your audio game
Video is only half the equation. Tap into Record Sound and make sure Spatial Audio is toggled on.
This setting is crucial because it unlocks the Audio Mix feature in your camera roll. Later on, you can edit the video to isolate voices, switch to a studio mic sound, or tweak the cinematic audio focus. If you record in standard stereo, you lose these options entirely.
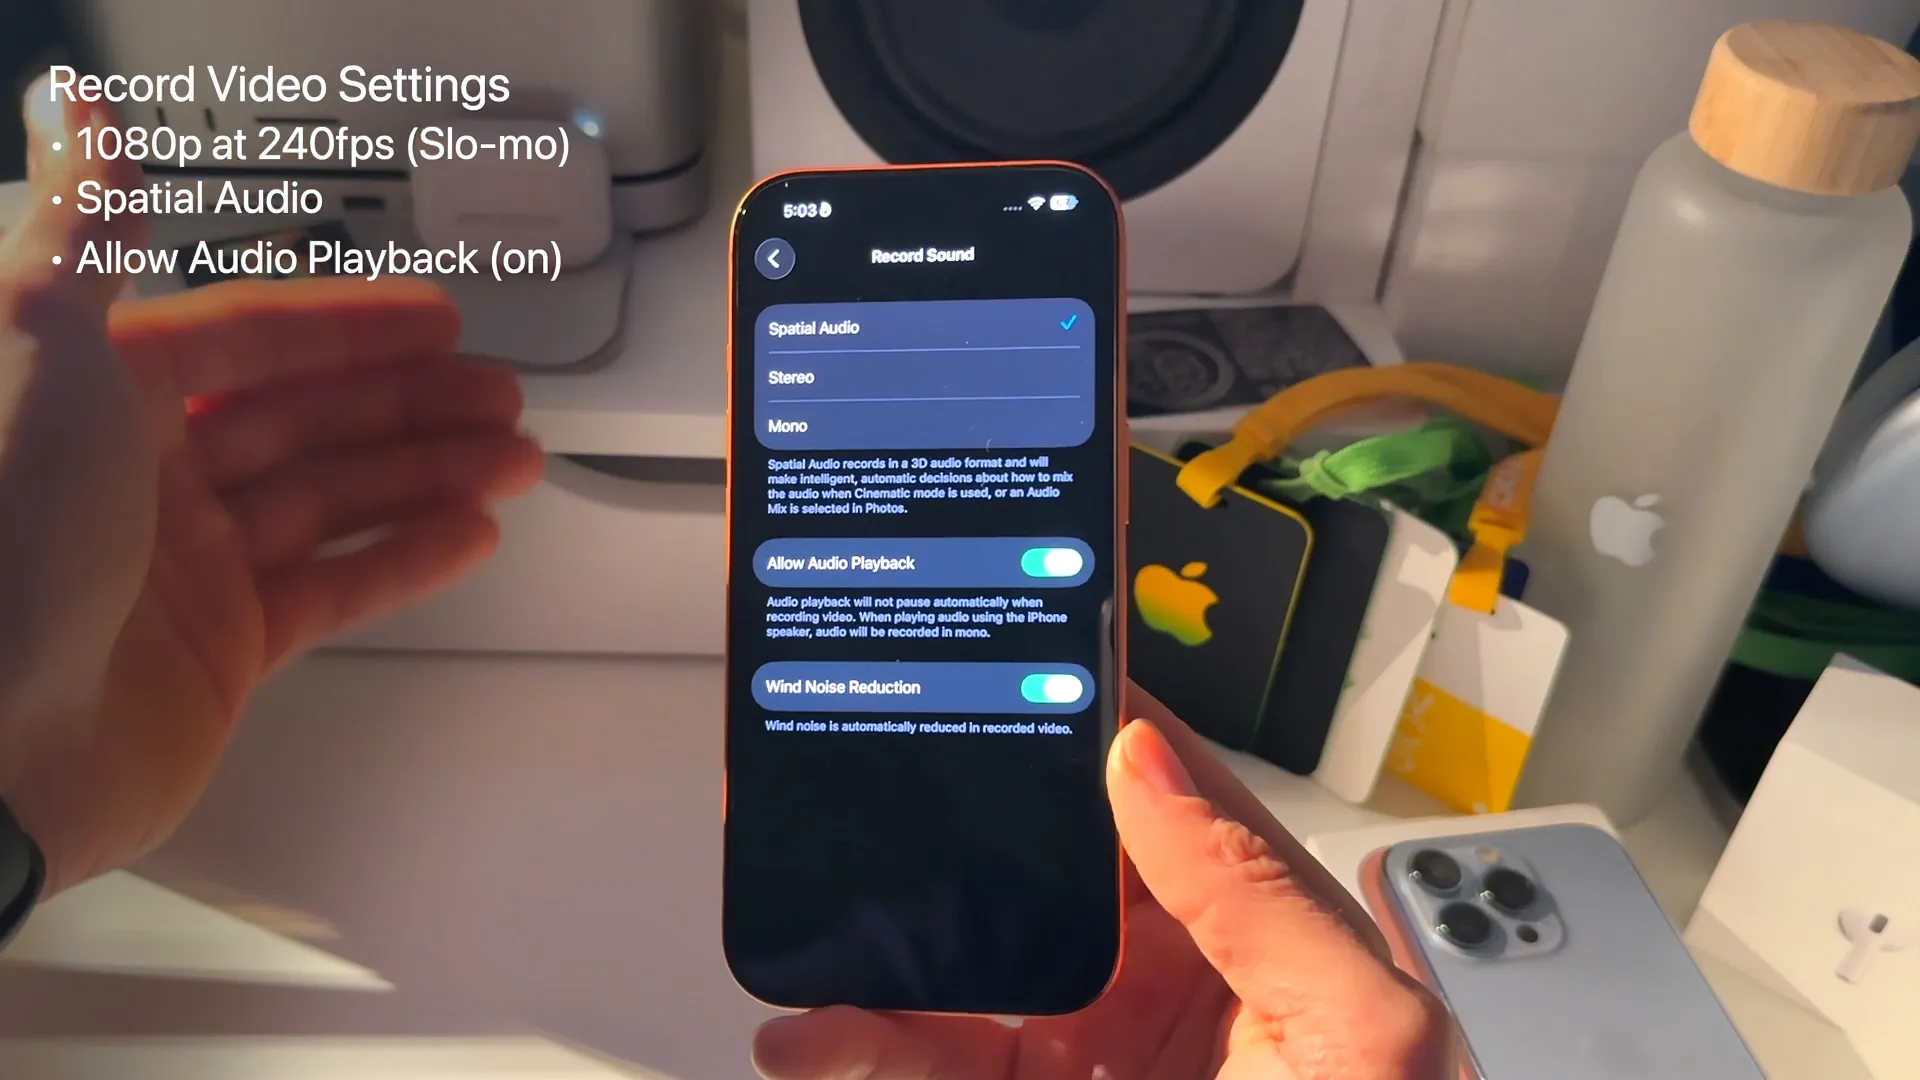
While you are in this menu, toggle on Allow Audio Playback. This lets you record video while continuing to play music from your phone. Finally, turn on Wind Noise Reduction to automatically filter out background gusts on breezy days.
Master composition and quick controls
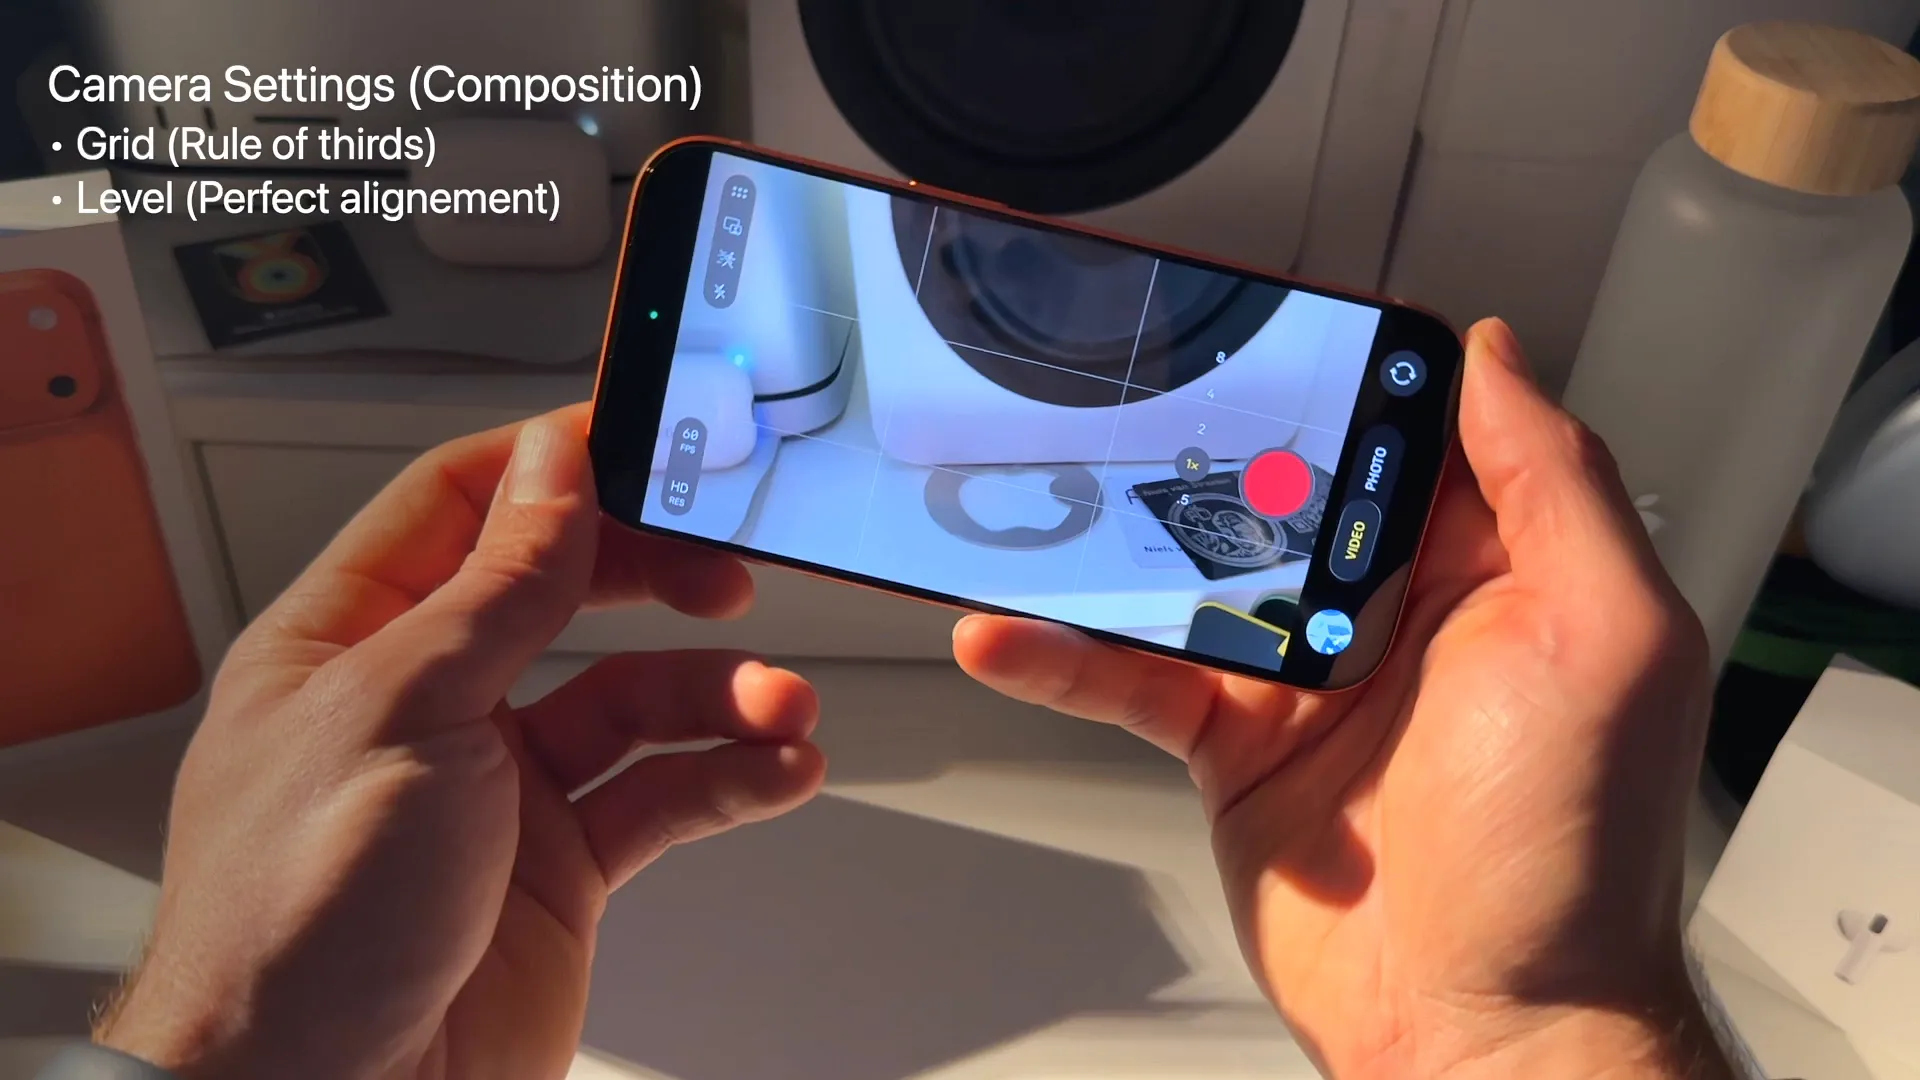
Scroll down to the Composition section and turn on both the Grid and Level. The grid helps you align shots using the rule of thirds. The level puts a small bar on your screen to ensure your horizons are perfectly straight.
Under Photo Capture, tap into Fusion Camera and ensure your default is set to the 24 mm (1x) lens. This gives you the highest optical quality available on the device.
A few more quick wins for your photo settings:
- Prioritize Faster Shooting: Keep this on so you never miss a quick moment.
- Use Volume Up for Burst: Turn this on. Holding your volume up button will fire off a rapid burst of photos.
- Lens Correction: Turn this on to fix the weird warping that happens on the edges of ultra-wide shots.
- Macro Control: Keep this on. It gives you a manual button to exit macro mode if your phone gets confused and auto-switches lenses when you get close to a subject.
Tame the Camera Control button
If you have a newer iPhone with the dedicated Camera Control physical button, you probably know it can feel a bit too sensitive.
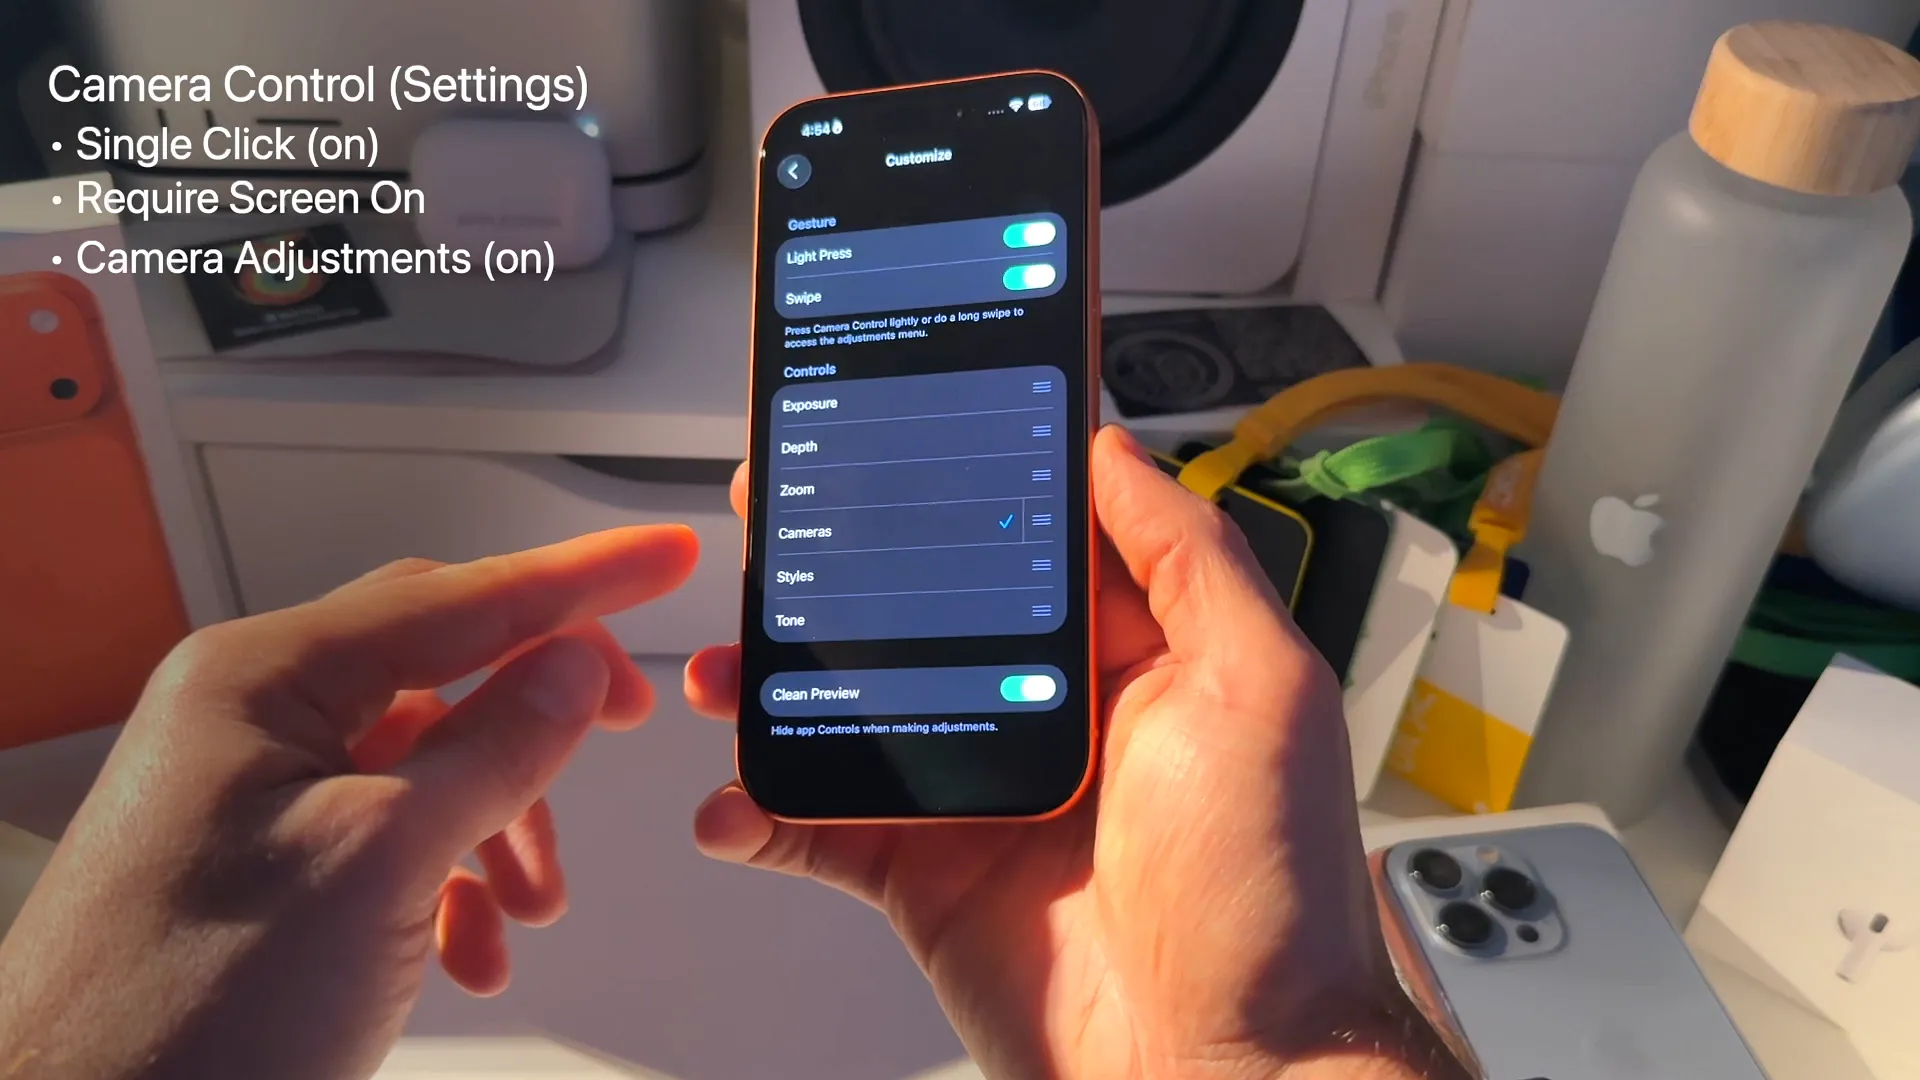
Go to your main iPhone settings, find Camera Control, and turn on Require Screen On to stop accidental pocket launches.
Next, tap into Camera Adjustments. Uncheck everything except Cameras. The swipe gesture on the button is highly sensitive. Trying to adjust zoom or exposure with it often ruins a perfectly framed shot. Leaving only the lens switching option active keeps the button useful without being annoying.
You are all set
These tweaks keep your interface clean, your files manageable, and your shots looking stunningly natural. Your phone is now optimized to grab the best possible photo or video at a moment's notice. Head outside and give it a spin.
Last updated: Jul 13, 2026