
How to set up and use StandBy Mode in iOS 17
Apple recently released iOS 17. One of the most exciting new updates is a feature borrowed straight from the Apple Watch. It is called StandBy mode.
This feature transforms your iPhone into a smart, always-on display while it rests on your desk or nightstand. Here is a complete guide to getting it working and customizing it to fit your style.
What you'll need
Before you start, make sure you have iOS 17 installed on your iPhone. You also need a charger and a stand that lets your phone sit horizontally. A magnetic MagSafe charging stand works perfectly for this setup.
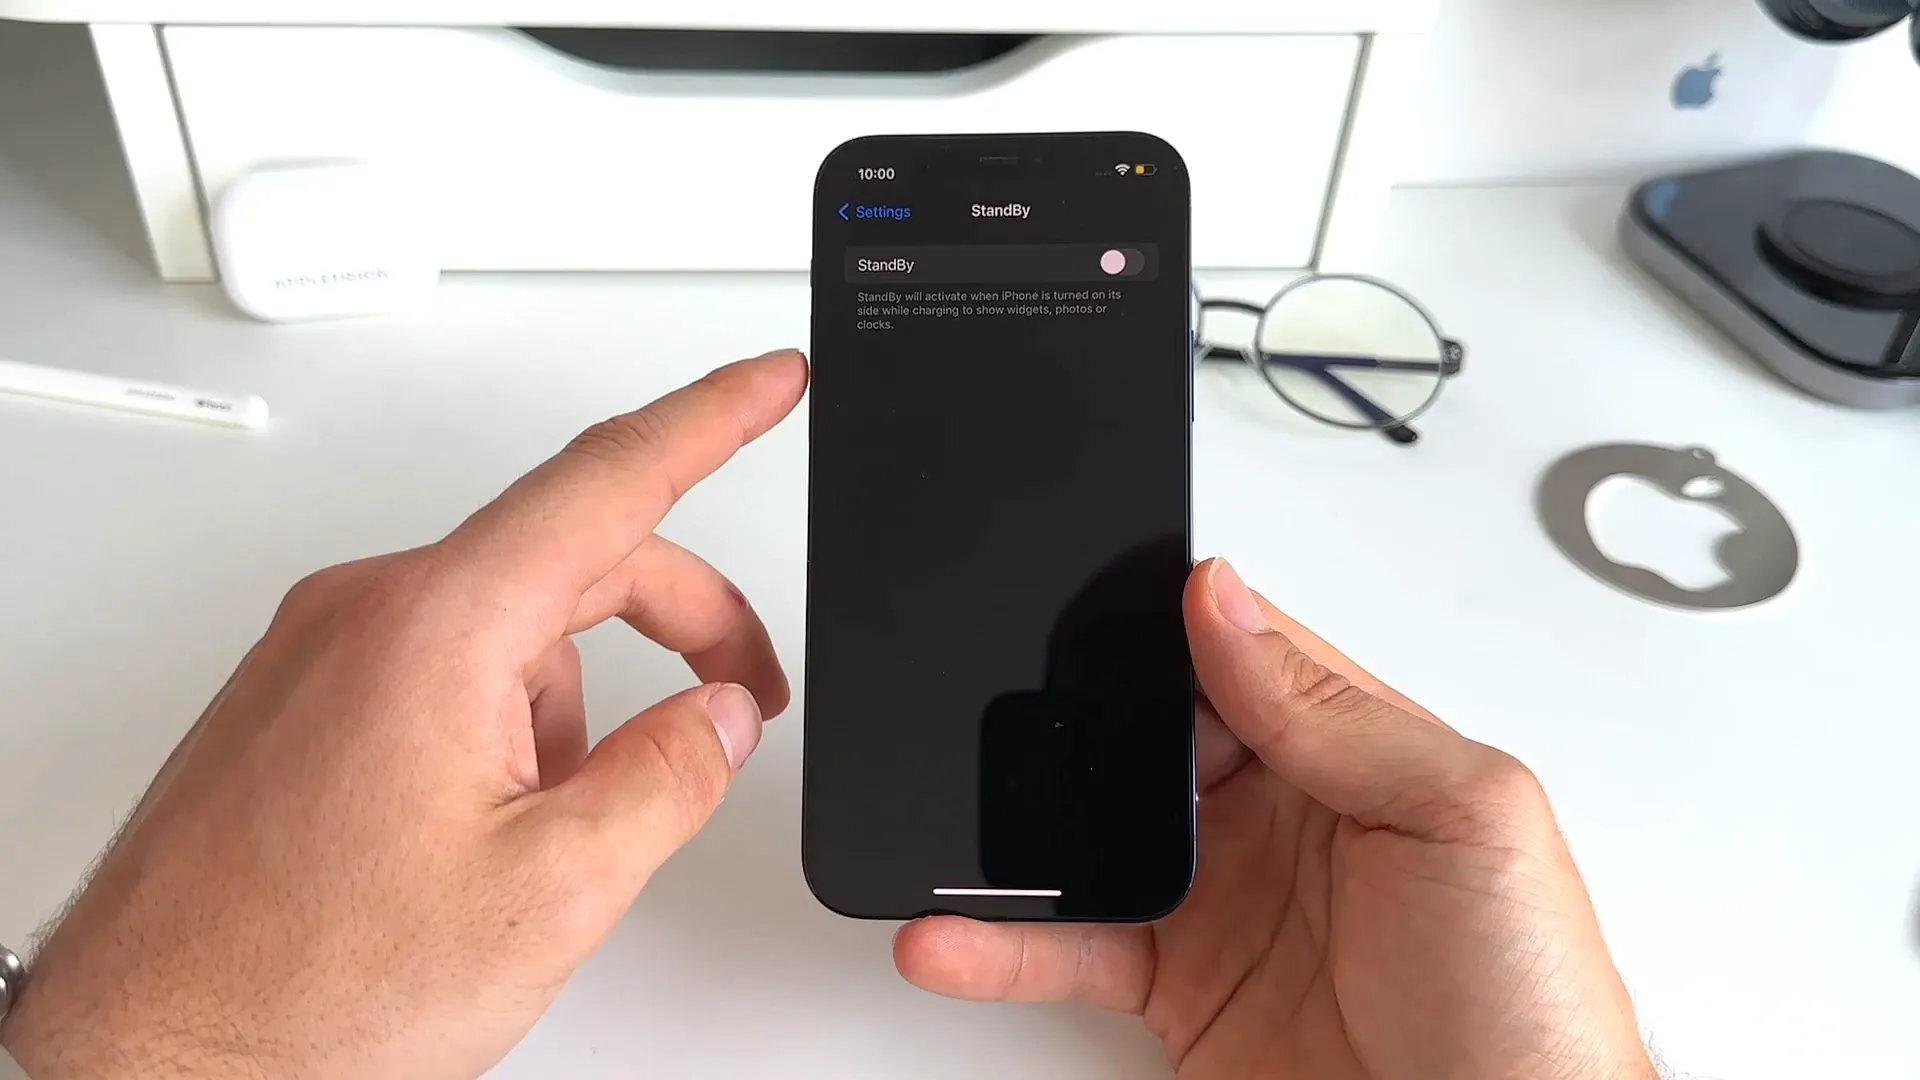
Step 1: Enable StandBy in your settings
First, we need to make sure the feature is actually turned on.
- Open your Settings app.
- Scroll down and tap on the new StandBy menu.
- Toggle StandBy to the on position.
While you are on this screen, you can also toggle on Night Mode. This gives your display a red tint in low ambient lighting so it doesn't blind you in the dark. You can also toggle on Show Notifications if you want critical alerts to pop up while the phone rests.
Step 2: Position and charge your iPhone
Now it is time to actually trigger the mode. Just putting your phone sideways on a stand will not do anything by itself.
- Make sure your iPhone is locked.
- Place the phone horizontally on your stand.
- Ensure the phone is actively charging.
Once your locked phone is sideways and receiving power, wait just a moment. The screen will automatically transition into StandBy mode.
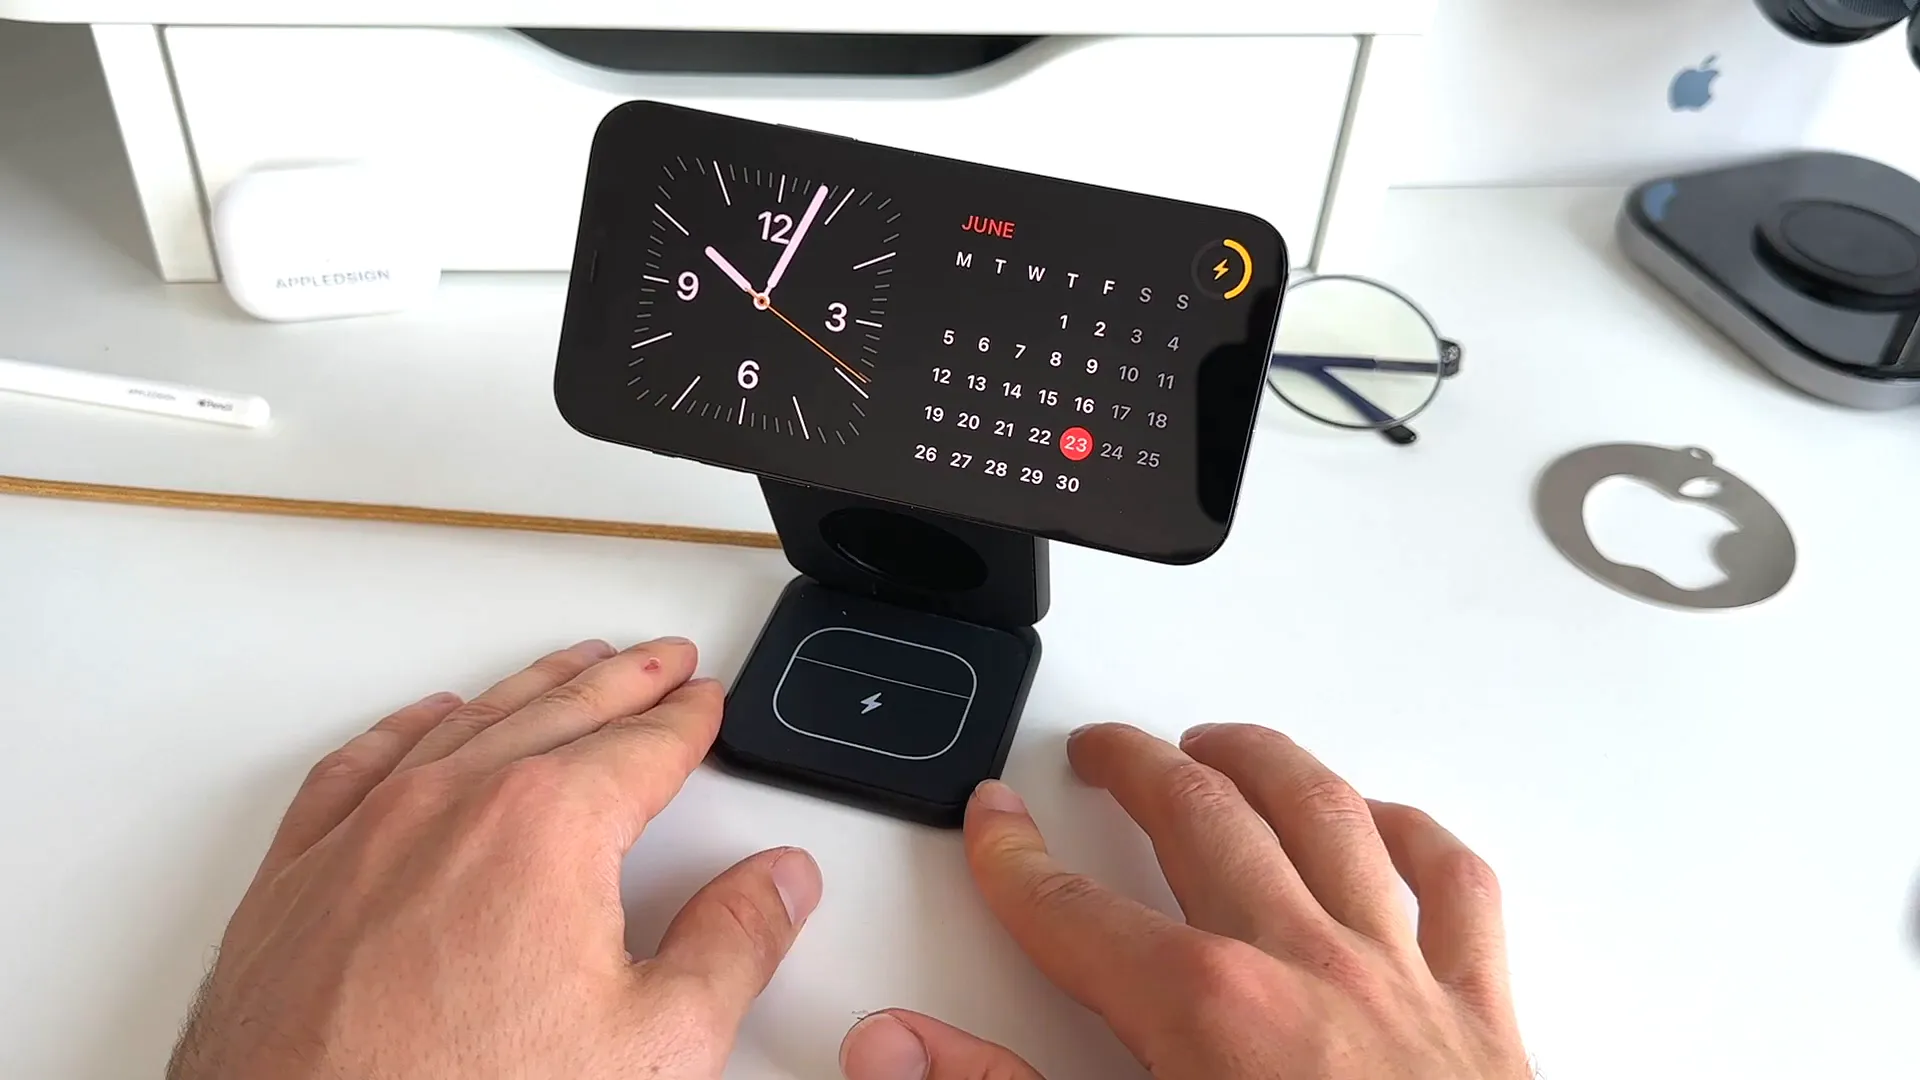
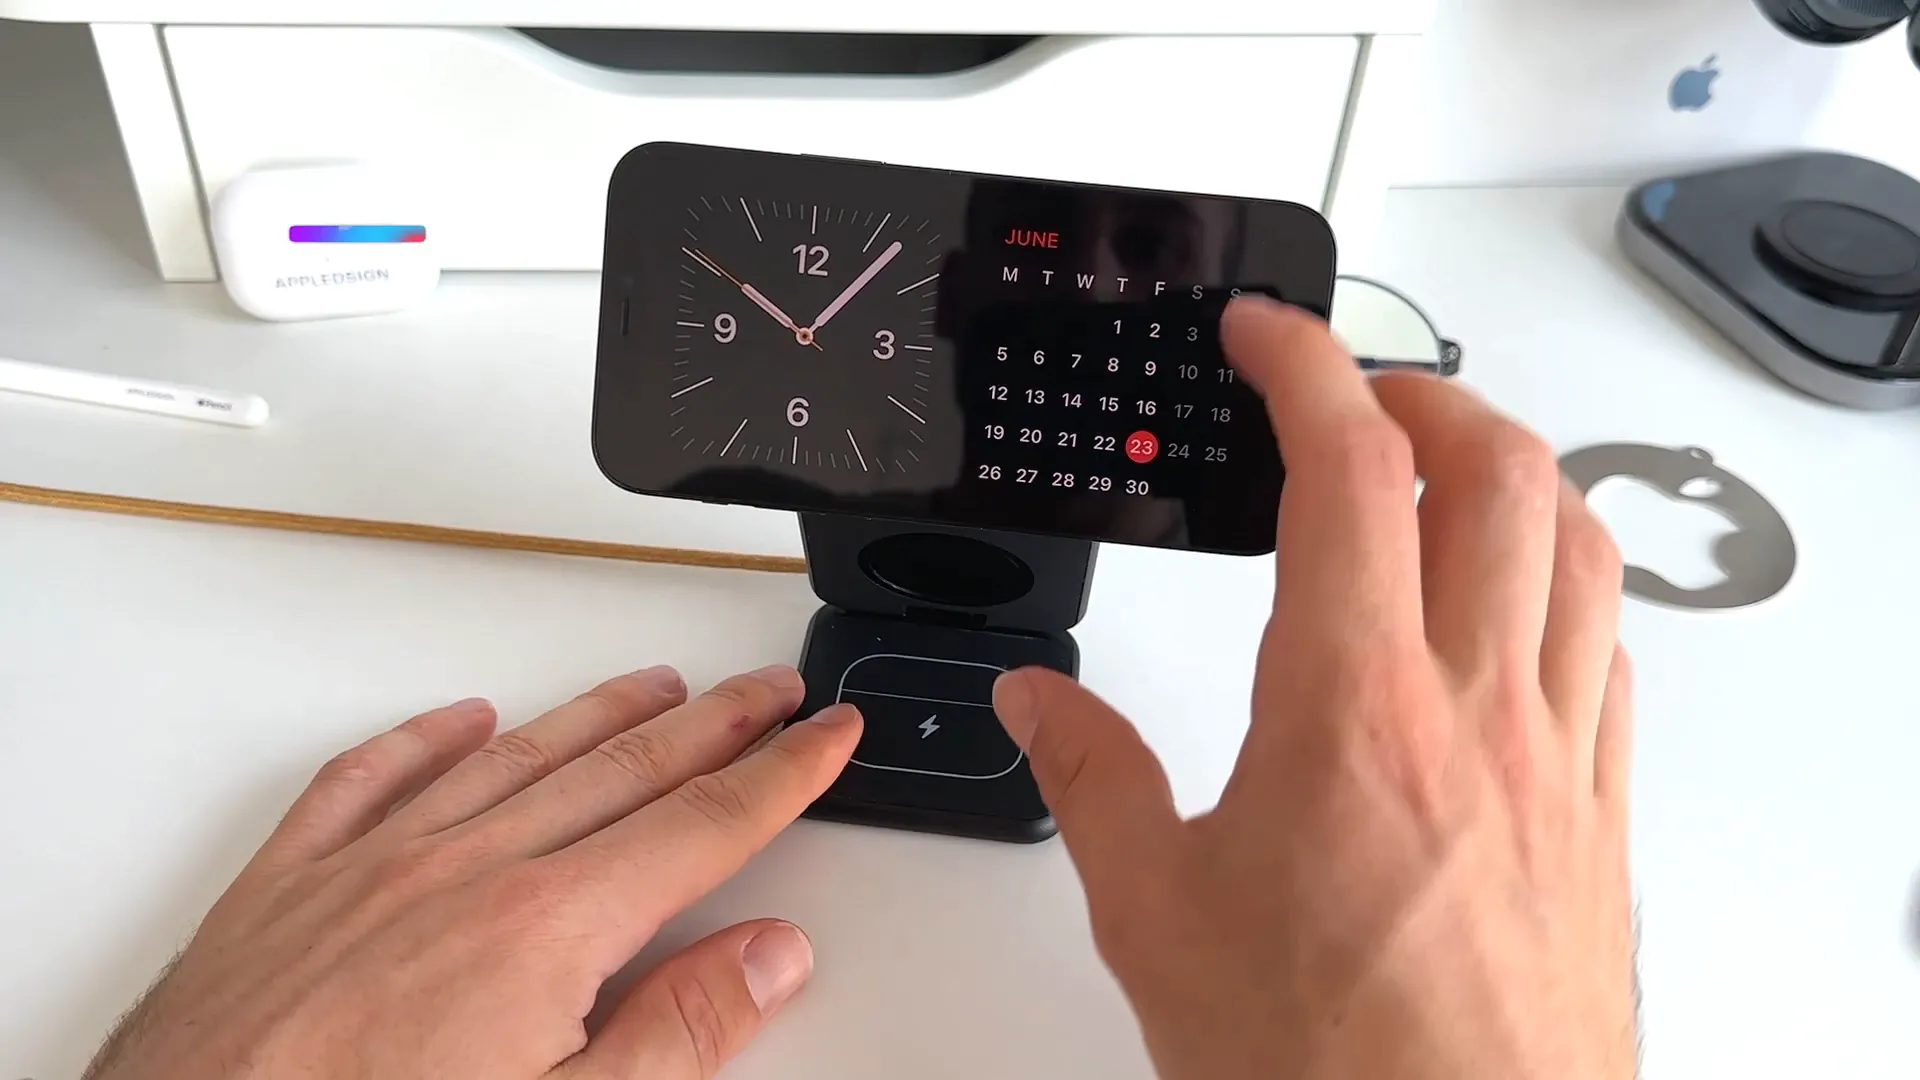
Step 3: Customize your widgets
By default, you will see a split screen with an analog clock on the left and a calendar on the right. You have plenty of customization options right at your fingertips to make this dashboard your own.
Swipe up and down on either side of the screen to cycle through different widgets. You can view your stocks, to-do lists, upcoming events, and the weather. Just remember to grant location access if you want weather data to show up.
Long-press on the screen to edit these widget stacks. From here, you can add or remove the widgets you don't want. You can also tap the icons on the right to toggle Smart Rotate and Widget Suggestions on or off.
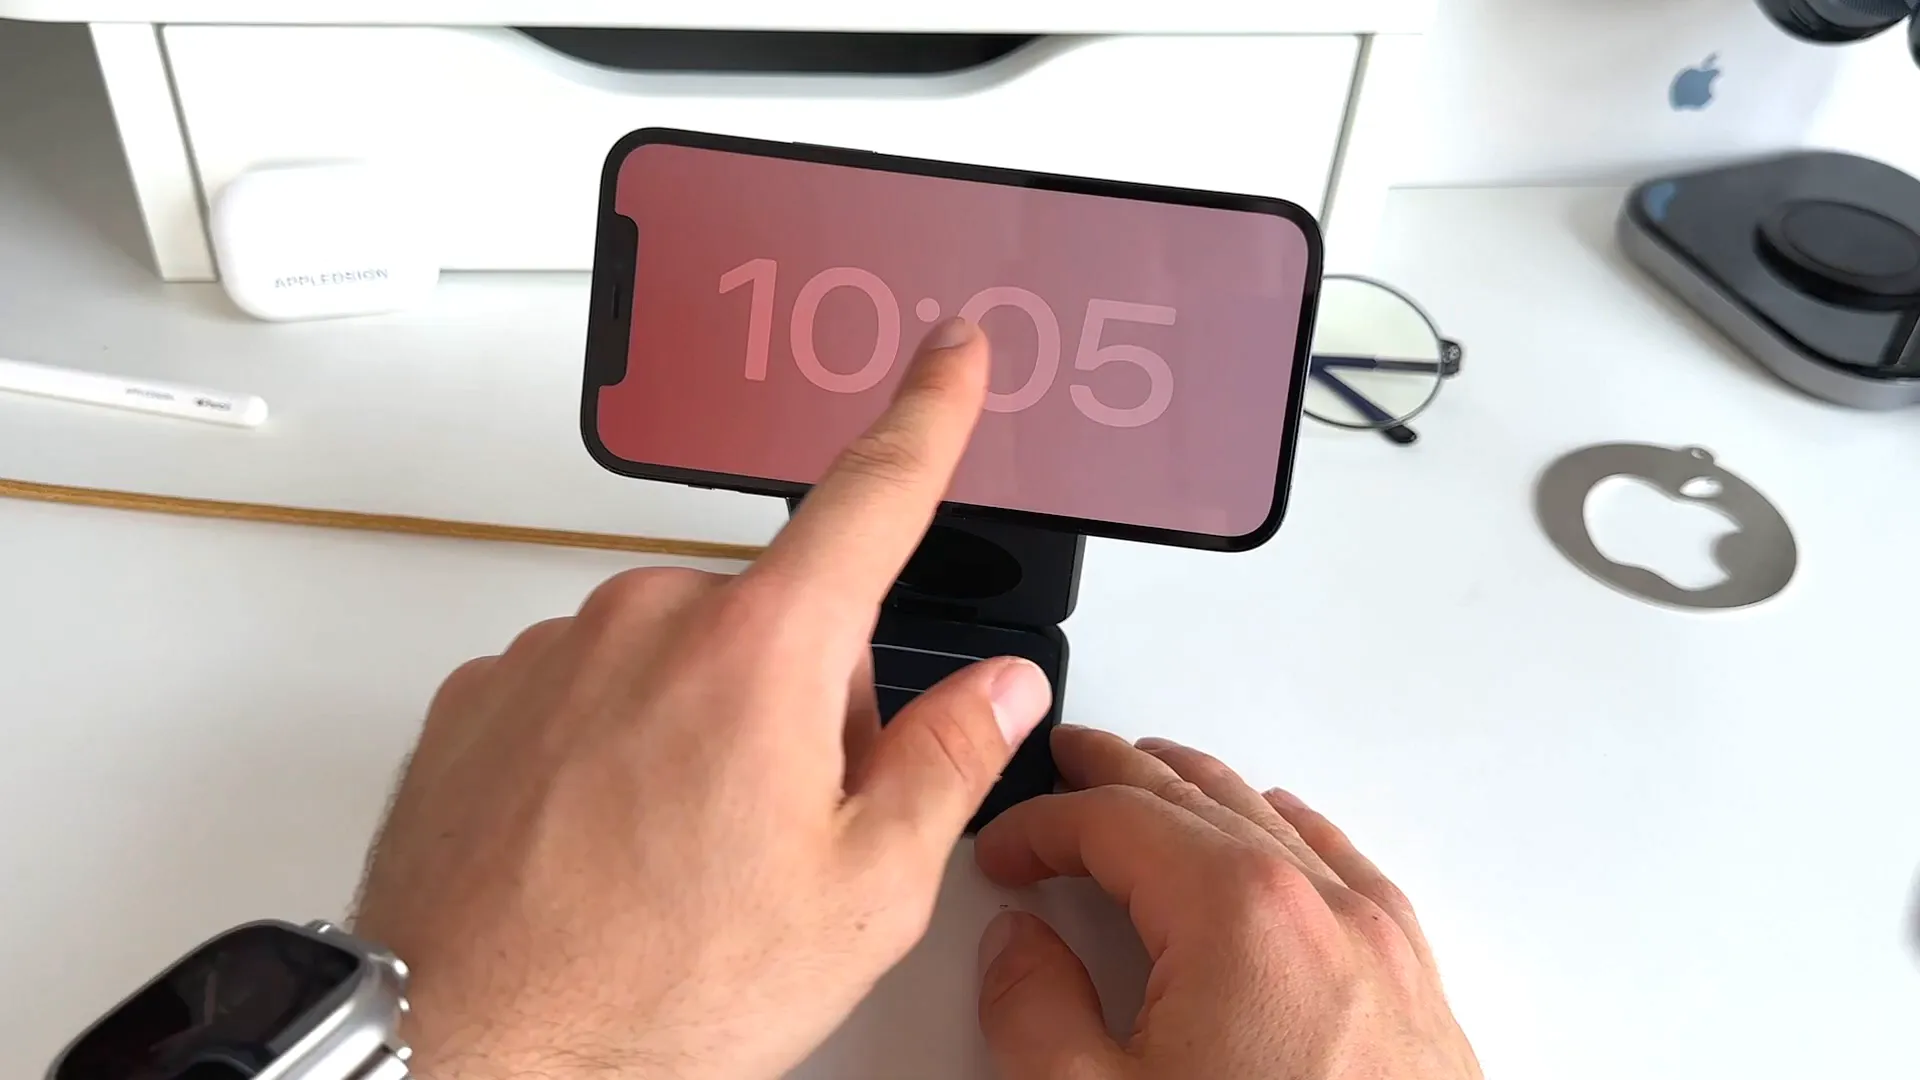
Step 4: Add photos and full-screen clocks
If you swipe left across the screen, you move away from widgets and into other full-screen views.
The first swipe brings you to your photos. The display will cycle through your memories automatically. You can long-press the screen to add specific albums, like your favorites or featured stories. Keep in mind that you will need to unlock your iPhone with FaceID to view these photos for privacy reasons.
Swipe left one more time to view full-screen clocks. These display the time, date, and current temperature. Swipe up and down to change the clock style. You can choose between a standard analog clock, a world clock, a gradient color clock, or a bubbly overlay clock.
If you want to change the colors, simply long-press the clock face. A color picker appears at the bottom right, letting you choose the exact tint you want.
You're all set
That is everything you need to know to use StandBy mode in iOS 17. It is a fantastic way to make your iPhone useful even when you aren't actively holding it. Go ahead and set up your perfect desk display.
Last updated: Jun 20, 2026